Sales Invoice
A Sales Invoice is a bill that you send to your Customers against which the Customer makes the payment.
Sales Invoice is an accounting transaction. On submission of Sales Invoice, the system updates the receivable and books income against a Customer Account.
To access the Sales Invoice list, go to:
Home > Selling Shortcuts > Sales Invoice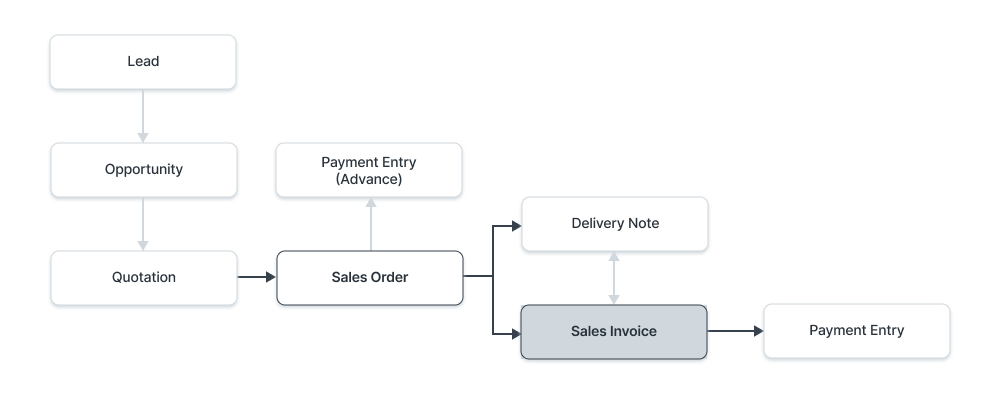
How to create a Sales Invoice
There are two methods for raising a Sales Invoice.
Method One
In the previous section we learnt to create a Sales Order, on the newly Submitted Sales Order click on "Actions" button.
Click on the Sales Invoice option under the drop-down.

After clicking on the option, The system shall redirect you to the newly created Sales Invoice, with all the relevant details already filled out (i.e.) Item details, Tax details, Payment details etc.

Finally click on Save and then Submit.
Method Two
For manual creation, follow these steps:
Go to the Sales Invoice list and click on New.
Select the Customer.
Set the Payment Due Date.
In the Items table, select the Items and set the quantities.
The prices will be fetched automatically if Item Price is added, else add a price in the table.
The posting date and time will be set to current, you can edit after you tick the checkbox below Posting Time to make a backdated entry.
Save and Submit.

Setting Updated Item Quantity on Finished Order
After the order has been successfully completed, at times the raw material that was utilized in finishing the order might've been more when compared to estimations given to the customer when they were handed the Proforma Invoice.
To handle this case properly (Payment Wise) It is important to update the Quantity of the item used on the Sales Invoice.
Take the example below for instance, the original expected meters for item was 40.

However after the job was completed, it was recorded that 50 meters was used instead of 40 meters, after updating the quantity click on Save.
The system will inform you that an advance payment was made against this order. Therefore, we should go ahead and link the payment from under the "Payments" tab.


After clicking on the "Get Advances Received" button, the advance payments will be fetched and attached to this table and the Totals under the Overview tab, will now show the updated information.

Furthermore, a Payment Entry can be made against this Invoice, The system will only fetch the outstanding amount for the payment as shown below.

Finally, Save and Submit the payment.
Last updated